 |
| "The Castle" |
Material
- Treated pine logs
- Treated pine decking
- Jarrah (for the strong base)
- Metal chain
- Metal piping
- PVC joiners (x 6)
- Bag of rapid set concrete (x 4, four poles do not require concrete)
- Craft paint - various colours (for the turn puzzle)
- Anti-rust grey metal paint
- Plastic lattice
- Plastic roof sheeting
- Various galvanised or treated pine fasteners
Procedure
- Start with the four main tall poles. These poles will be self supporting and do not require concreting in place.
- Dig four holes. Place the poles in the holes to a depth of 30 - 60 cm.
- Support the floor frame (see details below) in-between the four poles, ensuring the poles and floor frame are level.
- Bolt the floor frame to the four poles.
- Back fill the holes
- Three Bridge End Poles and Metal Side Rails
- Dig holes where the three bridge end poles are to be located.
- As there will be a heavier load on these poles put them at a depth of 60 cm.
- Drill holes into the wooden poles each end of where the metal poles are to be positioned. (Use a holesaw drill bit the same diameter as the metal pole, then chisel out the inside.)
- Cut the three side rail metal poles to length (use a girder/cut-off wheel).
- Fit the metal poles inside the holes in the wooden poles. Remember to feed the PVC joiners onto the end metal pole before fitting the pole.
- Concrete the three poles in place by pouring in the concrete mix, compacting with a metal pole, and adding water.
- Paint the metal side rails with rust proof paint.
- Paint four different symbols around the PVC joiners on the end metal pole.
- I used ABC 123, and then sets of matching shapes and colours.
 |
| Floor Frame |
- Create the square floor frame from hard wood for strength and to keep the termites at bay.
- Cut and screw down the treated pine deck. Remember the grooved side of the boards are designed to face downwards. Leave space between the decking to allow water to drain away.
 |
| Chain Bridge |
- Cut a number of treat pine decking boards to the same length.
- Drill through two holes, one each end, on all the boards.
- Using round headed coach bolts, bolt each board onto the two chains by passing each bolt through the board and a chain link. The rounded end of the bolt being on the board side where the children's feet will be walking, the washer and nut being on the under chain side.
- Be sure to leave gaps between the boards big enough so that little toes don't get trapped.
- Connect the ends of the chain to the floor frame one end, and to the three poles the other end.
** Warning: Learn from my mistake. I left small gaps between the rungs of the bridge so that little feet would not fall through the gaps. The mistake is that little toes can get pinched between the rungs in the gap. I would leave a large enough gap so that, when kids are bouncing the bridge, toes can not get pinched.
- Cut off two lengths of plastic lattice and fit for walls. The lattice stops little ones falling over the sides away from a supervising adult and gives the impression of walls with out having a closed in space where creepy crawlies can gather.
 |
| Roof |
- Two side beams bolted to the main riser poles.
- Three cross beams on top of those beams.
- The middle of those three beams being longer to allow the fireman pole to be fitted into in. The hole is cut into the beam using a holesaw drill bit and chisel. The metal fireman pole is then concreted in place.
- Finally on top, two short poles with a beam joined at 90 deg on top is coach-bolted on.
- Cut the plastic sheeting to length and screw on using timber roof screws.
- Paint the fireman pole with rust proof paint.
Command Centre
 |
| Command Centre |
See the
Command Centre project.
Flagpole
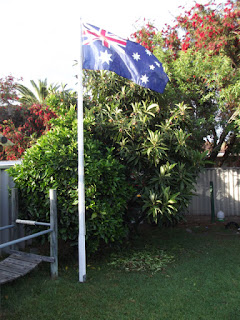 |
| The white turn puzzle (left) and flag pole (centre). |
See the
Flagpole project.
Cubby Raising (not barn raising)
We had a close friend and family members come over for the assembly of the cubby house; I prefabricated the structure. Many happy memories from that day. One of the last times spent with Granddad being able to help out. He had a love of sailing. That's the reason for later incorporating the boat mast as a
flag pole and the oars used in our
play boat.
 |
| Cubby Raising |
More Project Ideas
How about a
treehouse instead?


